Provide your vehicle details


General
How to Mount a Lightbar on a Roof Rack Like a Pro
11 Feb 2022
Lightbars are one of the most popular aftermarket upgrades for four-wheel drivers and adventures alike – for good reason. They’re incredibly affordable, improve night driving safety, and even make camping easier. But like most accessories, there’s a right way and a wrong way to install them on your 4WD. We’ve put together a handy lightbar installation guide that will make your future brighter with lightbars, and how to make sure the job stays done for years to come.
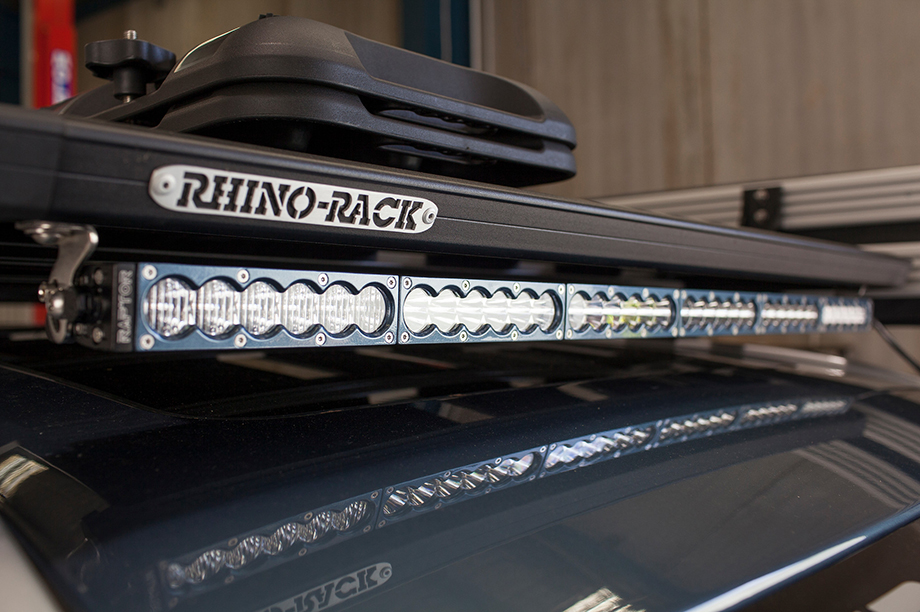
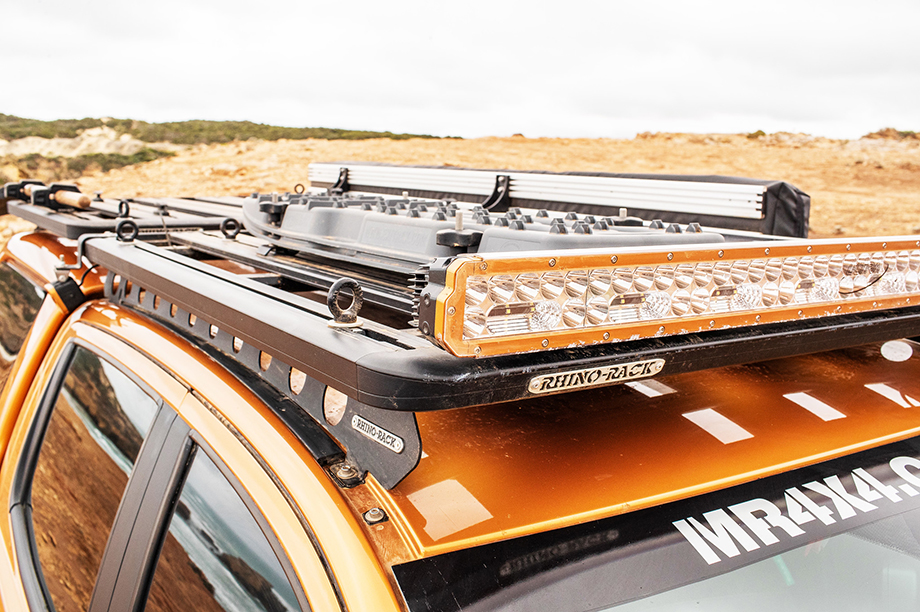
How to mount your lightbar on a roof rack
Having your lightbar securely mounted to your roof rack should always be step one of any installation. Over time, corrugations can play absolute havoc on cheap or flimsy lightbar mounts. Some lightbar mounts that secure directly to your sheet metal can even fatigue the surrounding metal and fail at the worst possible time. Depending on how your lightbar mounts, we’ve got both the Pioneer LED Light Bracket (43173) and Pioneer Light Bracket Kit (43156) that will ensure your lightbar stays exactly where you want it.

Once mounting your lightbar to your roof rack, it’s time to wire it up. In most states you’ll need to wire the lights up with the high beam switch to ensure they’re legal, but how you run the wires is just as important. Don’t go taking a 20mm hole saw to your roof skin just yet – you’ve got a few options. One of the most common methods used is running the cabling up behind the snorkel using stick on cable clips.
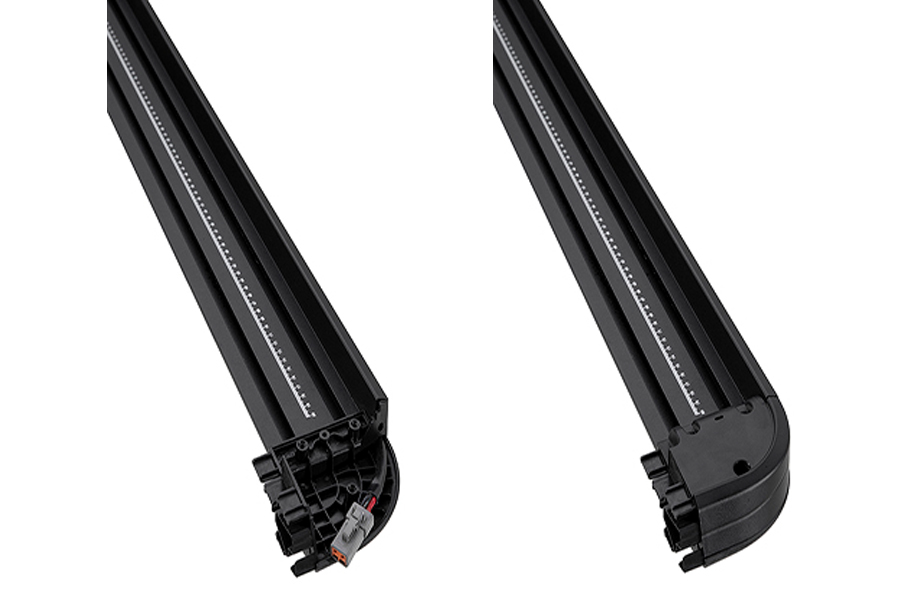
Once you’re on the roof your Rhino-Rack Pioneer Platform really comes into its own with integrated channels along the side of the platform which actually allows wiring to be run internally through the perimeter aluminium extrusions. By running the wiring internally Iit’ll protect your wiring from UV damage and minimise the chance of wayward branches snagging your hard work.
Don’t forget the camplights!
One of the best parts about compact LED lighting is how handy it can be around the camp. Say goodbye to setting up in the dark! They’re even helpful for seeing what’s around during roadside stops. For a compact low-profile installation our SI Light Bracket Kit (43202) can be orientated in any direction, giving you extra backup lights or handy side lighting. The Pioneer Worklight Bracket (43234) gives plenty of mounting options both low and high.
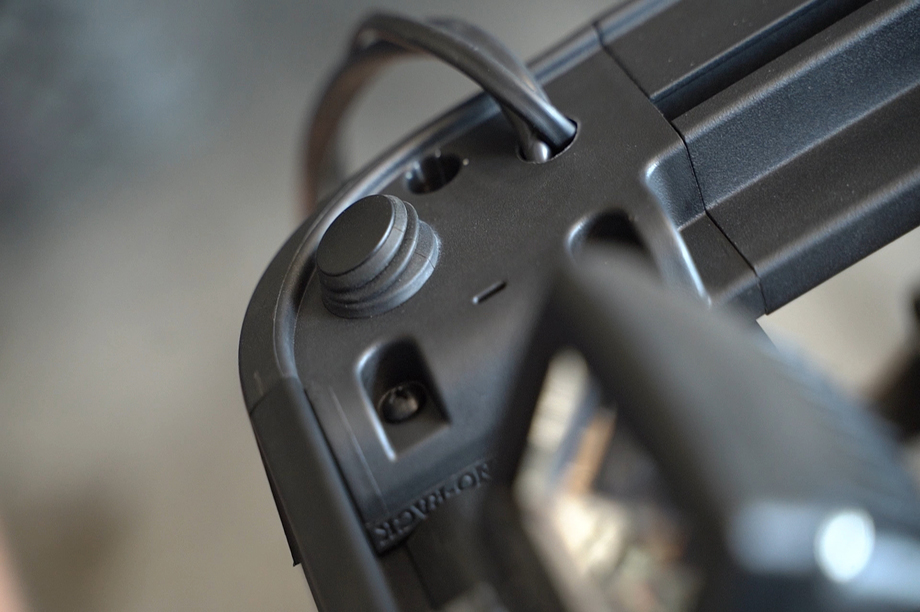
The Rhino-Rack Pioneer Platform also includes fibreglass re-enforced nylon corners, front and rear, allowing you can get full access to your wiring. We have designed the corners with the space and clear markings so you can mount switches for easy of use with camp lighting and other external accessories, one of the favourite upgrades for the guys at All 4 Adventure!
Night light considerations
The final piece to the puzzle of any roof-rack mounted LED light bar is understanding where the light will shine and how it will affect you at night. Warmer temperature colours (more yellow) are generally less jarring on the eyes but even those reflecting off a polished aluminium bull bar can cause problems. A solution to this common problem is non-reflective matte black vinyl wrap. It can be used on the back edge of shiny bull bars, antenna components, and even on the bonnet.
Whether you’re decking your 4WD out as the ultimate outback tourer, or just after a little extra light at your local campgrounds, a mounted LED lightbar attached to your Pioneer Rack is going to make life easier. And with some clever thinking and well-designed accessories, it’ll always be up for adventure when you are.